Most people who book paint correction expect the machine work to be the whole story. In practice, the polisher only removes what the prep process has already exposed. A car that goes straight from the wash bay to a cutting pad will show fewer swirls for a while, but it will also grind embedded iron, road grit, and old contamination into the clear coat. Across the Chicago suburbs, where winter road salt and brake dust sit on paint for months, the gap between "washed" and "ready" is where most correction results are won or lost. This guide walks through how we handle paint correction prep in Illinois, step by step, and why we treat prep as about 90 percent of the final result.
Table of Contents
- Quick Takeaways
- Why Prep Decides the Result
- Inspecting the Paint Before Anything Touches It
- Decontamination Before Polishing in the Chicago Suburbs
- Washing and Drying Without Adding New Swirls
- Masking and Protecting Trim and Edges
- Prep Approaches Compared
- Confirming the Surface Is Ready
- Common Prep Mistakes That Undo Good Correction
- Frequently Asked Questions
- References
Quick Takeaways
| Key Insight | Explanation |
|---|---|
| Prep is the job, not a warm-up | Polishing only removes what prep has exposed. Any contamination left behind gets ground into the clear coat during correction. |
| Inspect before you cut | Angled light and a paint depth gauge reveal the real defects and the clear coat left on each panel before a pad touches the paint. |
| Chemical decontamination comes before clay | An iron remover dissolves embedded ferrous particles that clay alone would drag across the surface. |
| Winter salt changes the plan | Cars driven through Chicago-area winters often need a longer decontamination stage to remove road salt residue and bonded brake dust. |
| Keep wheel tools away from paint tools | Using the same mitt or towel on wheels and body panels transfers abrasive grit onto the surface you are trying to protect. |
| Test before the full pass | A test spot confirms the pad, compound, and machine speed before the whole vehicle is worked, which protects clear coat on the thinnest panels. |
Why Prep Decides the Result
Paint correction removes a thin layer of clear coat. That is the only way to level scratches, etching, and oxidation, and it is also why any particle left on the surface becomes a problem. A pad that meets a grain of sand does not skip over it. It drags that grain across the paint and leaves a new defect behind.
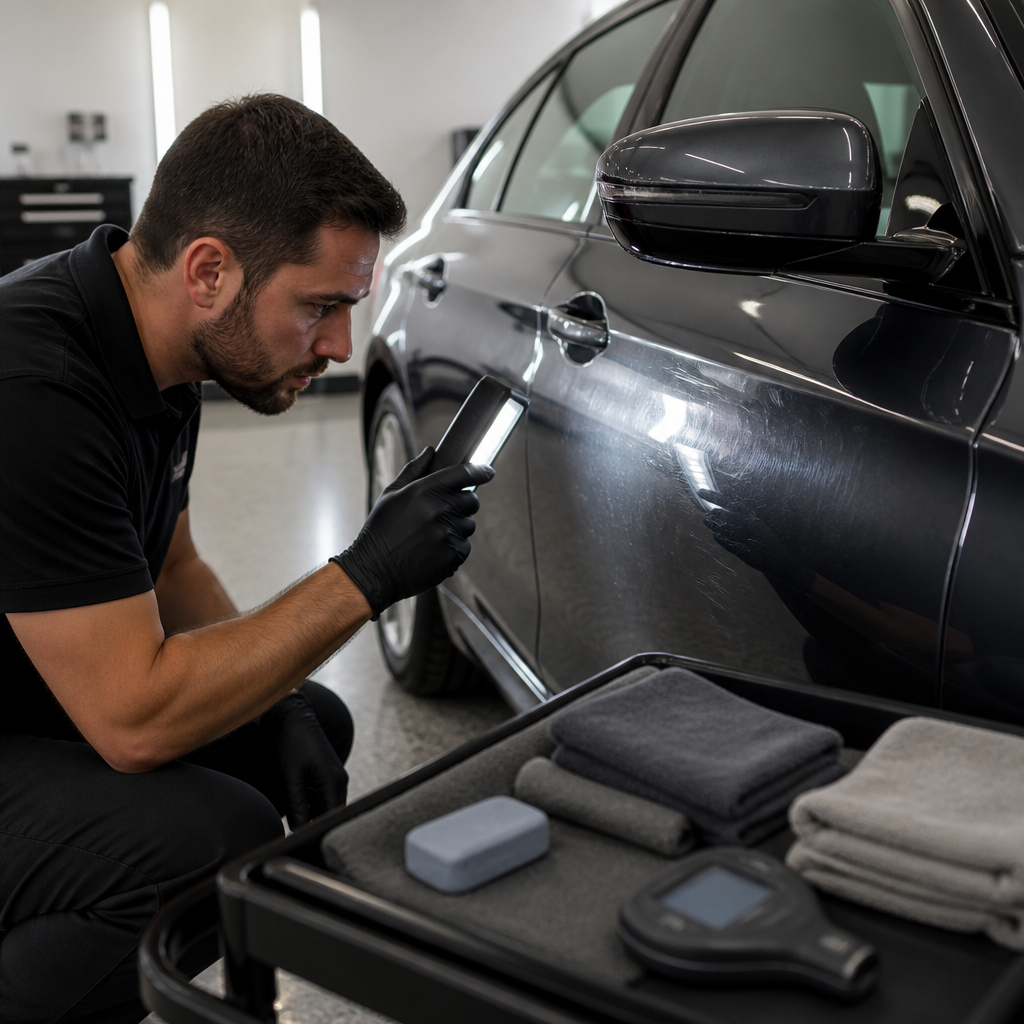
We see the same pattern on nearly every vehicle that comes through the bay. The owner expects a mirror, but the paint tells a different story until it is cleaned properly. A correction performed on a dirty surface can make the finish look worse than before, because the pad carries contamination and the new marks cross the old ones at odd angles.
What Polishing Can and Cannot Fix
A polisher reduces defects through controlled abrasion. It cannot lift bonded iron, dissolve tar, or remove mineral deposits left by sprinkler spray. Those contaminants need chemical or mechanical removal before any cutting compound goes near the paint.
When a machine is asked to do that job, the result is predictable. The surface gets flatter in some places and more scratched in others, and the owner ends up paying for a second visit.
Why Chicago Cars Arrive With More Contamination
Vehicles that live through northern Illinois winters often arrive with road salt residue, brake dust that has bonded to the clear coat, and grime packed into panel seams. Salt and brine solutions are corrosive to exposed metal, and they leave white residue that dries hard. None of this shows up as a clean finish until it is removed.
Polish removes defects. Prep determines whether the only defects you create are the ones you intended to remove.
Inspecting the Paint Before Anything Touches It
Every correction starts with an inspection that has nothing to do with the polisher. We look at the paint under direct, angled light and a handheld LED, not under overhead shop fixtures. Swirls and holograms only show at certain angles, so the car gets walked around in several positions while we take notes panel by panel.
Reading the Paint Under Controlled Light
Flat, even lighting hides the very defects a customer is paying to remove. A focused beam held at a low angle exposes swirling, fine scratches, and high spots that would otherwise be invisible. We mark the strongest and weakest panels so the plan reflects the whole car rather than the hood alone.
In practice, this stage also shows where the finish has been over-polished in the past. Sharp, uneven haze on a single door often points to a previous shop cutting too aggressively, and that panel needs a more conservative approach.
Separating Contamination From Permanent Defects
Some marks look like scratches but sit on top of the paint. Bonded contamination, water spots, and tar will often disappear after decontamination, while etching and deep scratches remain. Treating every mark as a defect to cut is one of the fastest ways to thin a panel without improving it.
A simple test helps here. If a mark disappears after a chemical pass and a clay pass, it was never a paint defect, and the polisher should stay off it.
Measuring Film Thickness Before Cutting
A paint depth gauge tells us how much clear coat remains on each panel. Panels that read thin get a more conservative plan, and we may choose to correct only partially rather than chase every mark. We would rather leave a faint defect in place than take a panel to the point where it cannot be protected properly.
Pro tip: Mark the problem areas with painter's tape or note them on the intake sheet before the car goes into the wash. That gives the team a map of the car instead of a memory of it.
Decontamination Before Polishing in the Chicago Suburbs
Decontamination is where most of the real prep work happens. The goal is to remove everything that is sitting on or in the clear coat, so the polisher only meets paint. For cars around Glendale Heights, Carol Stream, Bloomingdale, and Wheaton, that list usually includes road salt, iron fallout, tree sap, and bonded overspray.
Chemical Decontamination First
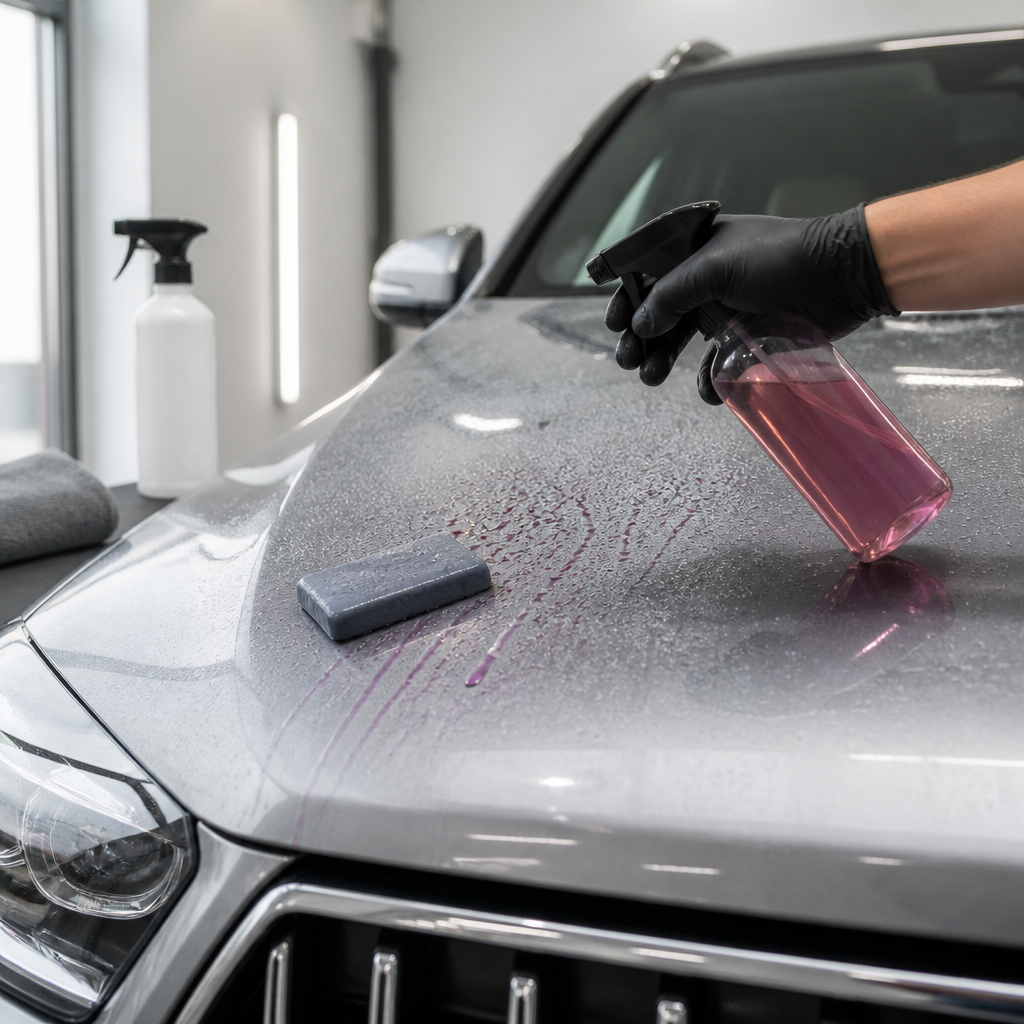
An iron remover reacts with ferrous particles embedded in the clear coat, which is why it changes color as it works. We apply it to cool panels, let it dwell for the time the product allows, and rinse thoroughly. Skipping the chemical step and going straight to clay means dragging hard particles across the paint for longer than necessary.
We also watch the wheels and lower panels closely. Those areas collect the heaviest iron load, and they are where contamination tends to hide in the textured surfaces of lower cladding.
Clay Bar and Clay Lubricant
Clay removes bonded contaminants that chemicals do not fully release, such as overspray and mineral fallout. The clay must be lubricated generously, and we fold it frequently so a trapped particle does not get dragged across the surface. A dropped piece of clay goes in the trash, not back on the car.
Clay should glide. If it grabs, stutters, or leaves streaks, the panel needs more lubricant or another chemical pass before we continue.
Pro tip: If a clay bar drags, stop. Add more lubricant, switch to a fresh section of clay, or go back to chemical decontamination. Pushing through a drag turns a prep step into a scratching step.
Why Local Water Changes the Plan
Hard water leaves mineral deposits that look like etching once they dry on the paint. Deposits that have baked into the clear coat can be harder to remove than the original contamination, especially on dark colors. We rinse more thoroughly and inspect for spotting when a car has been sitting outdoors in the same water for weeks.
Washing and Drying Without Adding New Swirls
A wash before correction sounds simple, yet it is where many new swirls are born. The wash is not the place to clean aggressively. It is the place to remove loose dirt without rubbing it into the finish.
Two-Bucket Washing With Grit Guards
Two buckets, one for soap and one for rinsing the mitt, keep grit out of the wash solution. Grit guards in the bottom of each bucket hold particles below the reach of the mitt. It sounds basic, but it is the most common source of the swirls our clients ask us to remove.
We change the mitt often on heavily soiled cars and wash from the top of the vehicle down. The lower panels go last because they carry the most dirt.
Drying Methods That Do Not Mark
Blowers are useful for mirrors, trim, and crevices, and they keep water out of seams where it can leave spots later. For the paint itself, we prefer gentle blotting or a dedicated drying towel pulled in one direction rather than rubbed in circles. Circular drying is one of the quickest ways to add fine marks to a freshly washed finish.
Cold Chicago mornings add a complication. Water that freezes on the surface can trap grit, so we avoid washing in conditions where the finish will not dry properly.
Keeping Wheel Tools Away From Paint
Wheels and wheel wells are cleaned first, with separate brushes and mitts, so brake dust and road grime do not migrate onto clean paint. Using a body mitt on wheels is a shortcut that transfers abrasive particles directly onto the panels. That single habit can add hours of corrective work to a car.
Masking and Protecting Trim and Edges
Masking is the step that protects everything the polisher should never touch. Emblems, parking sensors, badges, and rubber seals do not tolerate pads, compound, or polishing residue. A careful masking job takes time, and it is time well spent.
Tape Placement Around Sensors and Badges
We mask sensors and emblems with tape that releases cleanly, and we avoid running tape over paint that will be cut. Adhesive residue can be harder to remove than the tape itself, and it can soften the clear coat if it sits too long. Tape edges should be pressed down firmly so compound does not creep underneath.
Sharp body lines and raised edges need extra attention. Pads load up quickly on those edges, and the paint there is often thinnest, so we reduce pressure and check more frequently.
Protecting Plastic Trim and Rubber Seals
Textured black plastic can look faded after compounding, and polishing residue can stain it. We protect these areas before any product touches the surface, and we wipe trim with a clean towel after each stage. Rubber seals are protected from solvent-based products that can dry them out.
Panel gaps are another hidden risk. Compound that settles in gaps can dry and leave a haze that looks like a finish problem. We clean those gaps with a soft brush and inspect them before we call a panel finished.
Prep Approaches Compared
Not every prep sequence fits every car. Some shops take shortcuts to save time, and the results show up in the paint a few months later. The table below compares the three approaches we see most often, along with where each one holds up and where it fails.
| Prep Approach | Where It Works | Where It Fails |
|---|---|---|
| Wash and go straight to polishing | Fresh finishes with light dust and no bonded contamination | Leaves embedded iron and tar in place, and grinds them into the clear coat |
| Clay bar only | Surfaces with light overspray or mineral fallout | Misses ferrous particles that need a chemical reaction, and heavy contamination drags badly |
| Chemical decontamination, then clay, then wash and inspect | Daily-driven cars with winter salt, brake dust, and outdoor exposure | Takes more time, and still needs a careful inspection before any cutting begins |
The third approach is the one we use on most vehicles, because it removes contamination in the order it sits on the paint. The first two are faster, but they leave the paint carrying hidden debris that the polisher will find later.
Confirming the Surface Is Ready
Before correction starts, we need to know what the paint looks like without the protective layers that hide it. Polishing oils, leftover lubricants, and some sealants can mask defects. That is why the surface needs one more check before we commit to a plan.
Polishing oils and some sealants can mask defects, so we wipe each panel with a diluted isopropyl alcohol solution before the final inspection. The paint looks different after the wipe, and that is the version we plan around. Decisions made under a sealant film are often too optimistic.
Test Spots Before the Full Pass
We run a small test spot on a representative panel, usually a hood or door, and check the result under our inspection light. If the test spot does not improve the defect without excessive removal, we change the pad, compound, or machine speed before touching the rest of the car.
A test spot also tells us how the paint responds to heat. Some finishes clear quickly, while others need more patience and a gentler setting to avoid hazing.
Documenting the Starting Condition
We photograph each panel before and after prep so the owner can see what was removed. Documentation protects the car as well. If a panel shows unexpected thinning, we have a record of its condition before work began, and we can explain the decision that was made.
Documentation also matters for ceramic coatings. A coating bonds to the surface, so any contamination left underneath gets sealed in for years.
Common Prep Mistakes That Undo Good Correction
Most prep failures are not dramatic. They are small shortcuts that seem harmless at the time, and they add up to a finish that looks good for a week and then starts to show problems. These are the mistakes we see most often on cars brought in after another shop or a home attempt.
Skipping Decontamination Because the Car Looks Clean
A car can look clean from a few feet away and still carry bonded contaminants. Running a hand covered in a thin plastic bag over the paint reveals roughness that the eye misses. If the bag snags, the paint is not ready for polishing.
This is the mistake that costs owners the most. The polisher will not remove what the chemicals and clay should have lifted, and the result is a correction that leaves hidden debris behind.
Rushing the Drying Step
Air-drying and sloppy towel work can leave water spots and fresh micro-marks on the paint. Those marks then have to be corrected again, which adds time and clear coat removal. A proper drying step is short, but it needs focus.
Cutting Before Inspecting
Starting with the most aggressive pad on the worst-looking panel feels productive. In practice, it removes clear coat where a gentler approach would have been enough. Inspection and test spots exist to prevent that outcome, and they should never be skipped to save time.
Pro tip: If you are preparing a car yourself, avoid claying or chemically treating a vehicle you plan to have professionally corrected unless you know how to lubricate and fold the clay. A botched home attempt can add contamination that the professional has to remove first.
Frequently Asked Questions
How long does prep take before paint correction?
Prep takes a meaningful part of a correction day, and it is not something we shorten to fit a schedule. A larger vehicle with heavier contamination takes longer than a daily driver with a regular wash history. Rushing prep is the fastest way to make a correction take longer in the end.
Can I decontaminate my car before bringing it in?
A gentle wash and removal of loose debris helps, and it makes the intake inspection faster. Avoid clay or chemical treatment on a car you plan to have corrected unless you know the process well. Improper technique can add new contamination that the professional then has to remove.
Why does decontamination matter more in the Chicago suburbs?
Winter road salt, brine residue, and brake dust build up on the paint over the cold months. Those contaminants bond to the clear coat and need chemical and mechanical removal before polishing. Skipping that stage in this region often leaves visible haze after correction.
Will paint correction remove every scratch?
Correction reduces light scratches, swirls, and oxidation, but it cannot remove every defect. Deep scratches that have gone through the clear coat remain, and removing them fully may require more clear coat than a panel can safely spare. A proper inspection tells you which defects can be improved and which cannot.
Is prep worth paying for on a newer vehicle?
Yes. Newer cars can still carry transport contamination, dealership wash residue, and outdoor exposure from storage lots. Those contaminants need removal before any correction or coating, and they are easy to overlook on a car that looks new.
Does prep matter for ceramic coatings too?
Prep matters even more for coatings than for correction alone. A coating bonds to the paint surface, so any contamination or polishing residue left underneath gets sealed in. A clean, properly prepared surface is what allows the coating to perform as expected over the long term.
What has your experience been with paint prep, and did you notice a difference when a detailer took the extra steps before polishing?