Walk out to your car on a bright October morning and the headlights may look fine. Then switch them on during a November commute and the beam looks thin and yellow, with the low beams falling short of the edge of the lane. That gradual loss is UV haze, and it is one of the most common headlight problems we see across Glendale Heights, Carol Stream, Bloomingdale, and Wheaton. Headlight restoration in Illinois is not a cosmetic extra. It is a visibility item that belongs on your pre-winter detailing plan, next to the wash, the paint protection check, and the interior prep.
Table of Contents
- Quick Takeaways
- Why UV Haze Forms on Headlight Lenses
- The Water Test: Surface Haze or Deeper Damage
- Restoration Kits, Household Fixes, and Professional Work
- Why Fall Is the Right Window for Headlight Work
- What a Proper Restoration Involves
- UV Sealants and How Long Clarity Lasts
- Building Headlights Into Your Pre-Winter Detailing Plan
- Frequently Asked Questions
- References
Quick Takeaways
| Key Insight | Explanation |
|---|---|
| Yellow haze is UV damage on the lens surface | The factory UV coating wears away over years of sun exposure, and the plastic underneath then oxidizes. |
| A cloudy headlight is not always a dead headlight | Most lenses can be restored by sanding and polishing if the housing is sound and the pitting is shallow. |
| Run the water test before you book | Spray the lens while it is wet. If it clears to a glassy finish, the damage is likely shallow and restoration should hold. |
| Early fall is the best window to restore | Restoring before the first road salt gives you a clear lens for the darkest months and time for the sealant to cure. |
| The UV sealant decides how long the result lasts | A restoration without a UV-blocking topcoat is a temporary fix that can cloud again within months. |
| Ask for a flat quote that covers both lenses | Confirm the steps included, whether both headlights are done, how cracks or moisture are handled, and what the warranty covers. |
Why UV Haze Forms on Headlight Lenses
Most modern headlight lenses are made from polycarbonate, a tough plastic that handles impacts well but does not handle sunlight on its own. The factory applies a clear UV-resistant coating to the outside of the lens to slow the damage. Over years of sun, road grit, and washing, that coating thins and micro-scratches, and the plastic underneath begins to oxidize.
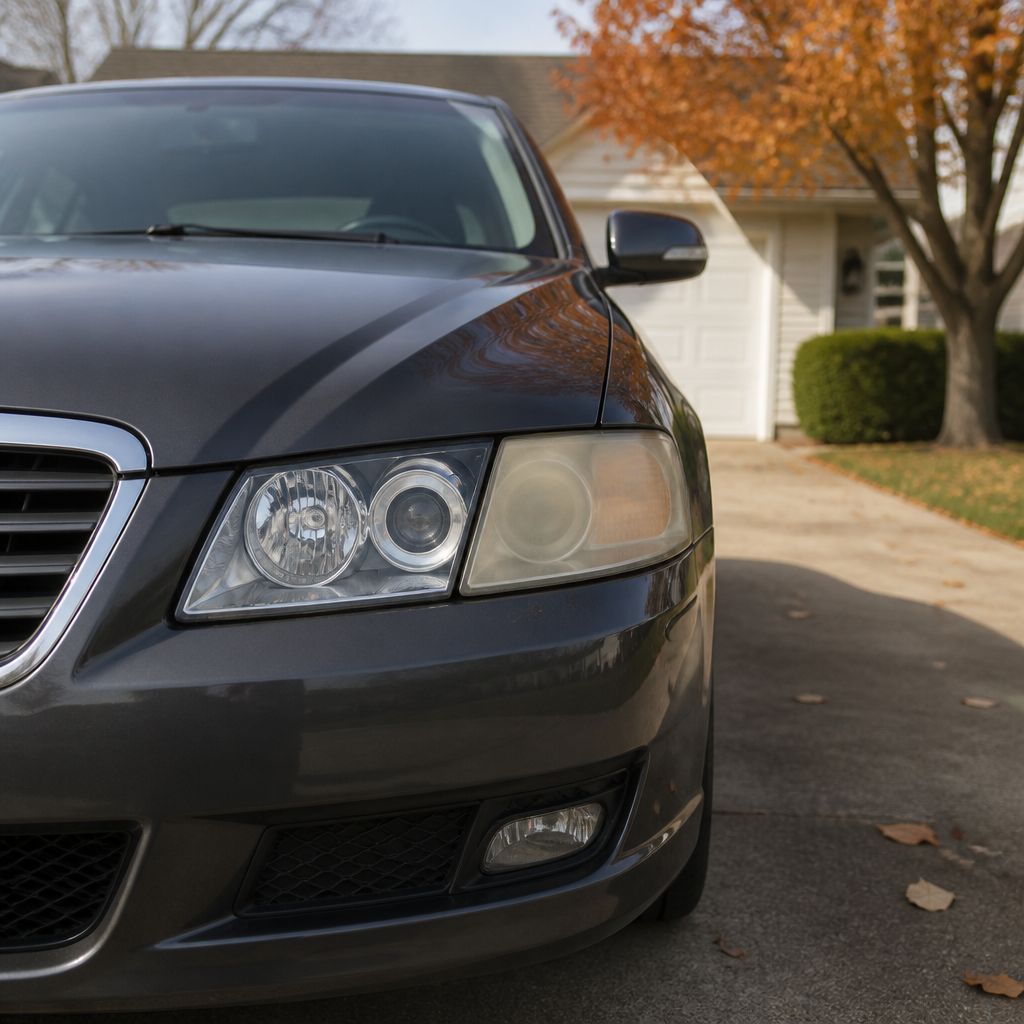
In practice, the first thing owners notice is a faint yellow tint. Later the lens looks chalky, and at night the beam pattern spreads out and loses reach. Many drivers assume the bulb is failing, when the lens is actually the problem.
What the Lens Coating Actually Does
A UV coating is a sacrificial layer. It absorbs the sun's ultraviolet energy so the polycarbonate does not have to. Once that layer is gone, nothing stops the plastic from yellowing, and the damage builds over time rather than reversing on its own.
This is why a headlight that looked fine at a three-year check can look noticeably worse after a fourth summer. You are not seeing a sudden failure. You are seeing the end of a protective layer that has been wearing away for a long time.
How the Haze Builds Up Over Seasons
Driving in the Chicago suburbs adds its own stress. Long summer days put the lenses in direct sun for hours, and winter brings road salt, sand, and repeated freeze and thaw cycles that work into every micro-scratch. A lens that has already lost its UV layer has nothing left to slow that process.
A common mistake is to scrub the lens with a harsh cleaner and assume the cloudiness is only dirt. Dirt rinses off, but oxidation does not. Aggressive cleaners can strip the little protection that remains and make the lens look worse.
The Water Test: Surface Haze or Deeper Damage
Before we quote any headlight job, we run a simple check that takes about 30 seconds and tells you a lot about whether restoration will hold. Spray the lens with a hose or spray bottle, then look at it while it is still wet. The result is more informative than a dry inspection.
If the haze disappears and the plastic looks glassy again, the damage is almost always confined to the surface. That is the best-case scenario, because wet-sanding and polishing can remove the oxidized layer and bring back the clarity the lens had before.
How to Run the Water Test
Start with a clean, dry lens so you can see the baseline haze. Wet it fully and look at it from a few angles, including straight on and from the side where the sun hits it. Compare it to the lens beside it, because uneven haze between two lenses tells you something useful.
Do not judge the result by a quick splash. Let the water sit for a moment so it fills the fine marks and shows the true depth of the cloudiness. Write down what you see, since you will want to compare it after any work is done.
What It Means When the Lens Stays Cloudy
If the lens stays cloudy even when soaking wet, the oxidation has likely gone deeper into the plastic. Polishing alone will not fully fix that, though it can still improve the look. This is the point where a professional should inspect the lens before you commit money.
Deep haze is not automatically a lost cause, but it does mean the job takes more time. Cracks, bubbling inside the housing, or moisture behind the lens are different problems that restoration will not solve, so ask for a clear explanation of what will be removed and what will remain.
Restoration Kits, Household Fixes, and Professional Work
Owners usually choose between three paths: a household fix, a consumer restoration kit, or professional service. Each can improve the look of a cloudy lens, but they do not produce the same result or the same lifespan. Knowing the difference saves money and avoids a second round of frustration.
AAA's consumer guidance on cleaning headlights points to purpose-built restoration kits that include UV protection for oxidized plastic lenses, and it contrasts them with household hacks such as toothpaste. In our experience, household options tend to give a quick cosmetic lift that fades once the lens is back in the sun.
Household Fixes and Why They Fade
Toothpaste and baking soda are popular because they are cheap and sit in every home. They are mildly abrasive at best, so they can polish a very light film, but they do not remove the oxidized layer and they do not add UV protection. A common mistake is to scrub harder, which can leave fine swirls that catch light at night.
If you try a household fix, use a soft cloth, work in small sections, and stop when the improvement stops. Then treat the result as temporary and plan a proper restoration before the cloudiness returns.
What a DIY Kit Requires to Work
A real DIY restoration needs more than a bottle. Chemical Guys' restoration guide lists automotive tape, wet and dry sandpaper in several grits, a headlight polish, microfiber towels, and a UV sealant as the basic supplies. 3M's product listing for its restoration kit describes a scratch remover or rubbing compound followed by a soft cloth finish to reach shine and clarity. Each step has a job, and skipping the sealant is the one most people regret.
The kit route works for owners who are patient, have a dry and sheltered workspace, and will follow the grit progression without rushing. It is less reliable for owners who expect a finish that matches a new lens, because technique matters as much as the product.
| Approach | What It Involves | Typical Result |
|---|---|---|
| Household fix (toothpaste, baking soda) | Light hand polishing with mild abrasives, no sanding, no new UV layer | A brief cosmetic lift that fades once the lens meets sun again |
| Consumer restoration kit | Masking tape, sanding in several grits, polish, and a hand-applied UV sealant | Good clarity when every step is followed, but results depend on technique and sealant quality |
| Professional restoration | Full wet-sanding to remove the oxidized layer, machine polishing, and a UV-resistant seal | Consistent clarity on surface-oxidized lenses, with the process backed by a guarantee where offered |
Whichever route you choose, ask what is removed and what is sealed. Those two answers predict how long the result will last far better than any marketing claim.
Why Fall Is the Right Window for Headlight Work
Late summer and early fall are the best time to restore headlights in the Chicago suburbs. A lens restored before the first heavy salt run starts the season with a clean baseline, and the sealant has time to cure before the coldest weather arrives.
The real reason to schedule early is visibility. Shorter days mean more of your driving happens in the dark, and a dim lens cuts into the reach of your low beams exactly when you need them most.
Salt, Grit, and the Dark Commute
Road salt, sand, and slush throw fine abrasive grit at your front end all winter. A lens with thin UV protection and existing micro-scratches takes that punishment badly. Restoring before winter removes the worst of the haze, so there is less damage for the grit to work into.
Many owners notice the decline in November, when the commute is dark and the beam suddenly looks weak. That is a poor time to discover the problem. Scheduling in September or October gives you a usable lens for the whole season.
Booking Before the First Freeze
Shops fill up as the weather turns, so an early booking is usually easier to schedule. Ask whether the price is a flat quote for both headlights, because per-lens pricing can change the total quickly. A 2026 cost guide from Thumbtack puts most headlight restorations roughly between $153 and $267, with complex jobs reaching higher. Treat that as a rough benchmark, since local quotes depend on the vehicle and the condition of the lens.
Sealant curing is temperature sensitive, so check the product label for its minimum application temperature. Confirm whether the work is done indoors. A heated bay makes a real difference when the outdoor temperature drops, and that is one reason cold-weather DIY work is risky.
What a Proper Restoration Involves
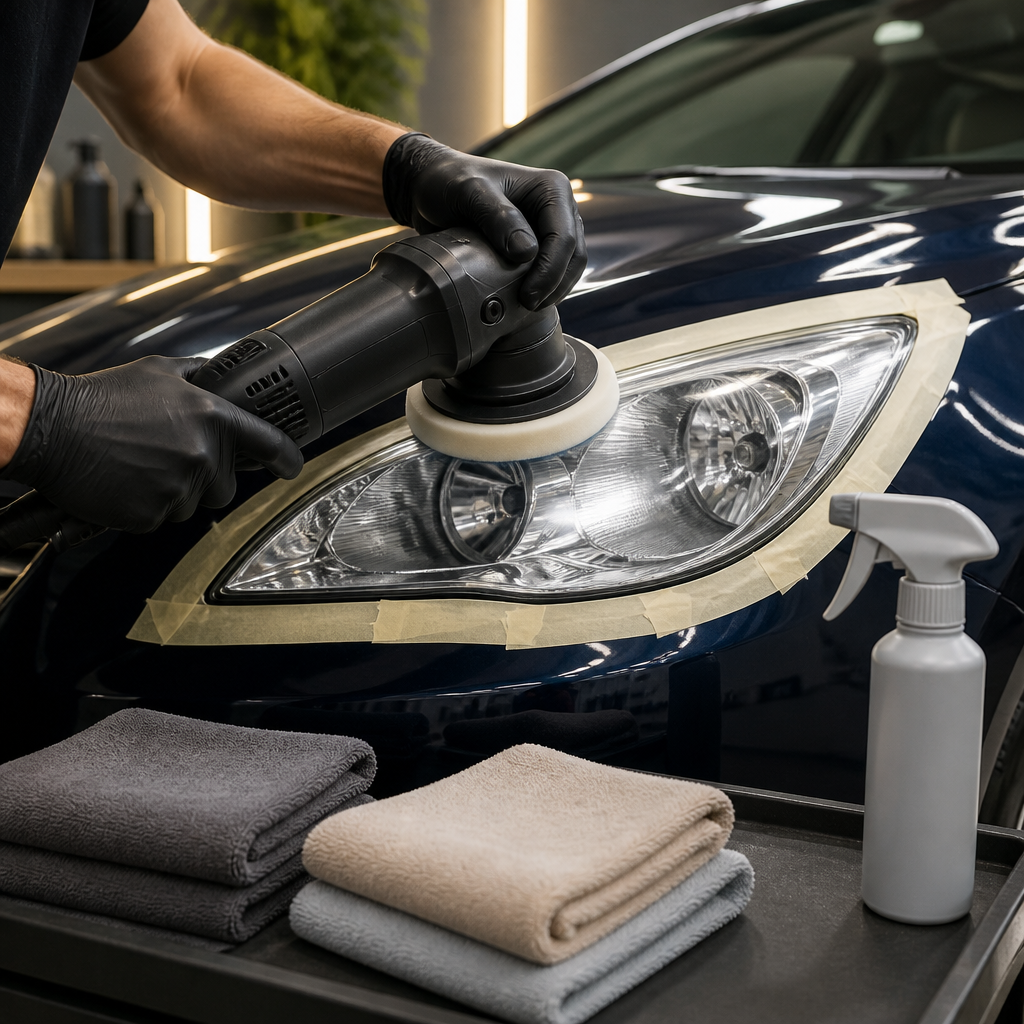
A proper restoration starts with masking the surrounding paint and trim. Tape protects the body panels from sandpaper and polish, and it is a step that cheaper work often skips. Once the area is protected, the lens is cleaned and inspected for cracks, pitting, and moisture.
The most important stage is removing the oxidized layer completely. Polishing alone can make a lens look better, but it leaves the damaged layer in place. Full wet-sanding levels the surface so the clarity has something solid to last on.
Wet-Sanding in Stages
Wet-sanding moves through progressively finer grits, with water lubricating each pass. The goal is to replace each coarser scratch pattern with a finer one until the haze is gone. Jumping from a coarse grit straight to polish leaves scratches that can show up as cloudiness a few months later.
The sanding stage is where experience shows. Too little pressure leaves haze behind, while too much heat or pressure can thin the lens. Good work checks progress with the water test at each stage rather than relying on a single look at the end.
Machine Polishing and Final Inspection
After sanding, machine polishing refines the surface and restores optical clarity. A cutting step levels the remaining marks, and a finishing step brings up the gloss. The lens should look clear in daylight and at a slight angle, not just under shop lights.
Final inspection matters as much as the work itself. Check both lenses side by side, look for haze near the edges, and confirm the housing is dry and seated properly. If something is wrong, it is far better to catch it before the car leaves the bay.
Pro tip: Ask for both headlights to be restored in the same visit, then compare them side by side in daylight. A lens that looks clear on its own can still look different from its twin, and matching the pair is part of a correct job.
UV Sealants and How Long Clarity Lasts
Restoration without a UV seal is a temporary fix. Once the sanding and polishing are finished, the lens is bare plastic that has lost its factory protection. Without a new barrier, the same oxidation process starts again.
This is the step that separates lasting work from a quick cosmetic result. In our experience, lenses that cloud back up within months usually came out of a job where the topcoat did not block UV well enough to protect the plastic.
Why the Sealant Matters More Than the Polish
A polish restores shine, but a sealant provides the long-term protection. Look for a product that is explicitly rated for UV protection on headlights. The label should say so, and if it does not, treat that as a warning sign.
Ceramic-based topcoats are designed for longer protection than a basic wax. The chemistry varies from product to product, so ask what is in the topcoat and how it is applied before you accept the job.
Maintenance That Protects the Result
Once the lens is sealed, simple habits extend its life. Wash the lenses with a pH-neutral soap rather than harsh degreasers, and avoid abrasive pads. Parking in a garage or shaded spot during summer also reduces the sun exposure that wears down the seal.
Check the lens each spring. If the surface begins to look dull again, a light refresh is far cheaper than a full restoration. Waiting until the haze is deep is the expensive path.
The sealant is the one part of a headlight job you cannot see once it is finished, and it is the part that decides how long the work lasts.
Pro tip: Photograph both headlights from the same spot at night, once right after restoration and again each spring. Comparing photos makes slow haze easy to spot before it becomes a visibility problem.
Building Headlights Into Your Pre-Winter Detailing Plan
Headlights belong on the same checklist as paint protection, wheel cleaning, and interior prep. A pre-winter plan exists to protect what cold, salt, and short days will test. Lens clarity is one of the few items on that list that directly affects how safely you see at night.
We treat lenses as part of exterior detailing rather than a separate novelty service. When paint is being decontaminated and sealed, the lenses belong in the same workflow, so the exterior is finished as one coordinated process.
Bundling Lenses With Exterior Detailing
A bundled visit makes sense for most owners. The car is already washed and the prep work is done, so the lenses can be sanded and sealed without dust drifting onto freshly finished paint. Ask how the lens work is masked and protected before the job starts.
For luxury and high-end vehicles, bundled work also cuts down on separate appointments. Ask for a written list of what is included, including whether both headlights are covered and how cracks or moisture are handled.
Where Ceramic Coatings Fit
Our nano-ceramic SiO₂ coatings carry 5 to 8 year warranties, and lens sealing belongs in the same conversation about long-term protection. A ceramic coating on paint does not replace the UV protection on the lens, so each surface needs its own treatment.
Before you commit to a coating plan, confirm which parts of the car are covered and ask for the warranty terms in writing. A clean, clear lens also helps you judge the finished paint in good light, which is a practical reason to restore the lenses first.
Plan the lens work for September or early October, then build the rest of the pre-winter schedule around it. The result is a car that looks finished, sees the road clearly, and is protected before the first salt.
Frequently Asked Questions
Can headlight restoration be done during an Illinois winter?
It can, but the work and the sealant need controlled conditions. A heated, enclosed bay is the safer setting because sealants need a suitable temperature to cure. If you are booking late in the season, ask where the work will be done.
How long does a proper headlight restoration last?
Lifespan depends on the sealant, sun exposure, and how the lens is maintained. Properly sanded and sealed lenses can stay clear for a long time, while lenses parked in direct sun without care show haze sooner. Ask for the warranty terms in writing so you know exactly what is covered.
Is restoring a headlight the same as replacing it?
No. Restoration removes the oxidized surface of the existing lens, while replacement installs a new unit. Restoration is usually the better choice when the housing is intact and the haze is surface-level, and replacement makes more sense when there are cracks, moisture, or damage that sanding cannot remove.
How can I tell if the haze is inside the lens?
Run the water test first. If the lens stays cloudy when wet, the oxidation may be deeper and a professional should inspect it. Moisture or condensation inside the housing is a different problem and needs a diagnosis before any polishing.
Will restored headlights help me see better at night?
Often, yes. Clear lenses let more light through and focus the beam more predictably, so the road ahead looks brighter and lane edges are easier to read. Restoration will not fix a weak bulb or a misaligned housing, so check those separately.
What finally pushed you to address your own cloudy headlights, and how did the results hold up through the winter?