Most detailing shops in the Chicago suburbs skip the inspection entirely. They glance at the paint in fluorescent overhead light, pick up a machine polisher, and start working. That is a problem, because polishing paint without measuring it first is the fastest way to burn through clear coat and permanently damage a vehicle's finish. At Hersheys Detailing in Glendale Heights, the inspection is not a formality before the real work begins. It is the real work. Paint thickness inspection in Illinois matters because Midwest winters, road salt, and inconsistent prior body work create conditions that vary wildly from panel to panel, and a detailer who cannot see that variance will cause more damage than they fix.
Table of Contents
- Quick Takeaways
- Why Inspection Must Come Before Polishing
- Paint Thickness Gauges Explained
- Studio Lighting for Paint Defect Detection
- Hersheys' Inspection Process Step by Step
- Comparison: Inspection Approaches in Professional Detailing
- What the Inspection Reveals Before Ceramic Coating
- Frequently Asked Questions
- References
Quick Takeaways
| Key Insight | Explanation |
|---|---|
| Factory paint ranges from roughly 100 to 180 microns | Readings outside this range signal either a repaint or dangerously thin clear coat that cannot survive machine polishing without burning through. |
| A single panel can vary by 50+ microns across its surface | Body lines, edges, and corners are always thinner. Gauging only the center of a panel gives a false sense of safety. |
| Overhead fluorescent light hides most paint defects | Swirls, buffer trails, and fine scratches are essentially invisible in diffuse overhead light. They only reveal themselves under focused, raking light sources. |
| Studio lighting exposes defects that sunlight cannot | Bright, direct sun washes out shallow swirls. A focused LED inspection panel or a controlled studio array shows them clearly by casting micro-shadows across the paint surface. |
| Thicker readings usually indicate prior body work | A panel reading 300+ microns almost certainly has filler or additional paint layers underneath, meaning paint correction on that panel carries different risks and requires a different approach. |
| Inspection data determines the correction grade | A one-stage polish on thin paint is a shortcut that causes irreversible damage. Thickness data dictates whether a panel gets a light enhancement or a multi-stage correction. |
| Inspection protects both the vehicle and the detailer | Documenting pre-existing thin areas, repaints, and defects before work begins means Hersheys can prove exactly what condition the car arrived in, protecting both parties. |
Why Inspection Must Come Before Polishing
A paint correction done without a prior inspection is a guess. The polisher removes clear coat on every pass, and once that material is gone, it does not come back. On a luxury vehicle like a BMW M4 or a Porsche Cayenne, the factory applies paint through a highly controlled process, but the thickness that ends up on any given edge or body line can be significantly less than what sits on a flat panel. Add in the reality that many used vehicles in the Chicago suburbs have had at least one panel resprayed, and you have a surface that can shift from 150 microns to 380 microns between adjacent panels.
The problem is that none of this is visible to the naked eye. A freshly repainted panel looks identical to an untouched one under normal shop lighting. A clear coat that is down to 50 microns looks the same as one at 130 microns. Without a paint thickness gauge, a detailer is operating blind, making decisions that could result in burned edges, haze, or outright primer showing through.
Skipping inspection is a cost-cutting move that gets passed on to the vehicle owner, not the shop. Hersheys Detailing treats the inspection as a non-negotiable first step for every paint correction and ceramic coating job in Glendale Heights. It is what separates a professional process from a production-line polish.
Paint Thickness Gauges Explained
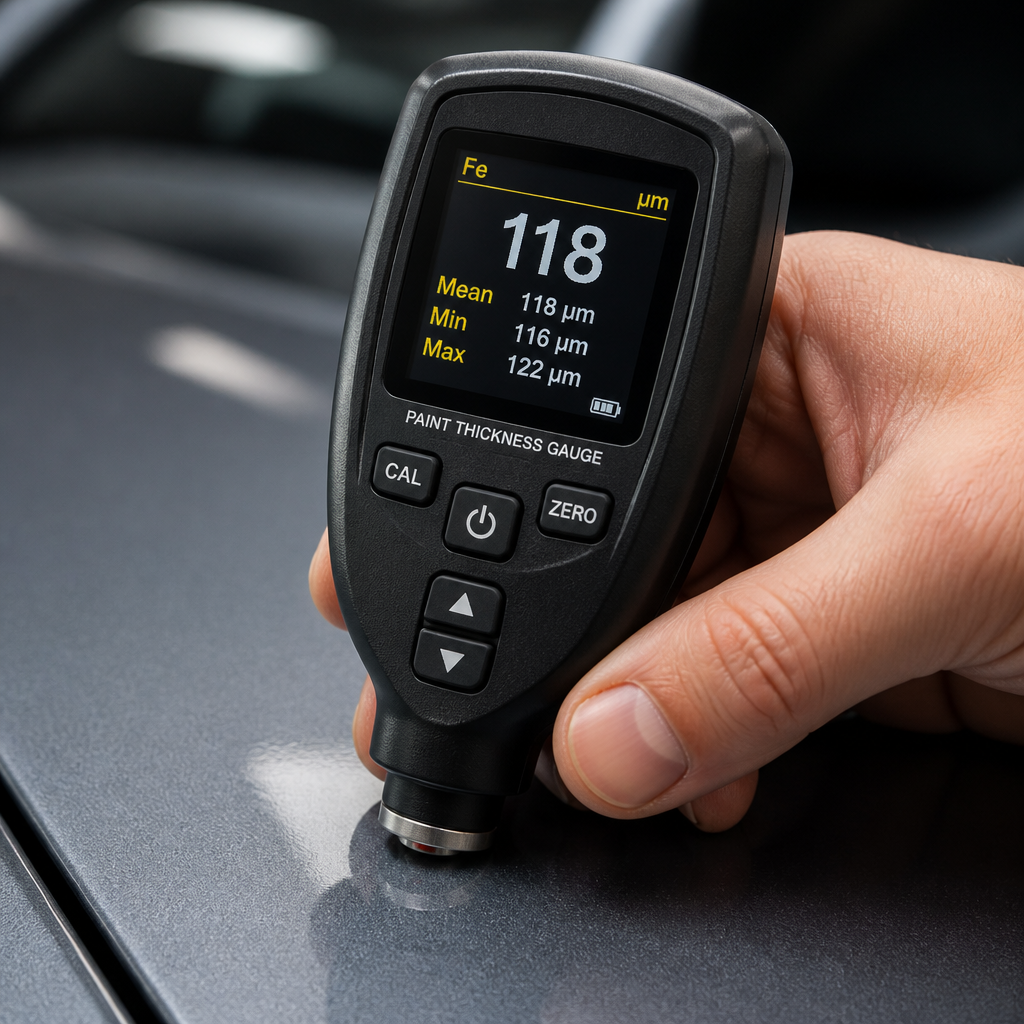
A paint thickness gauge is a handheld instrument that measures the total coating depth on a vehicle panel non-destructively. It works by placing a probe against the paint surface, and the instrument calculates thickness using either magnetic induction (for steel panels) or eddy current technology (for aluminum panels). Professional-grade gauges read in microns and are accurate to within a few microns when properly calibrated.
What the Numbers Actually Mean for Detailing
Most factory paint jobs range from roughly 100 to 180 microns. Thinner readings indicate that the clear coat is almost entirely removed, or in the case of single-stage paint systems, that the primer is about to show through. Thicker readings are often a strong indication that repainting has occurred.
For a detailer, those numbers translate directly into action. A panel reading 130 microns can handle a careful two-stage correction. A panel reading 85 microns cannot safely accept any machine polishing at all. A panel reading 350 microns needs to be investigated further, because that amount of material typically means filler or a respray, and the adhesion of a ceramic coating on a poorly prepared repaint is a legitimate concern.
Calibration Is Not Optional
A gauge that is not properly calibrated before each use is worse than no gauge at all, because it gives false confidence. Proper calibration requires confirming a 0.0 reading on an uncoated metal surface, then verifying accuracy using a calibration shim. Professional detailers calibrate on each vehicle because panel material and surface geometry affect readings. Skipping calibration is exactly the kind of corner-cutting that Hersheys does not do.
Pro tip: Always take thickness readings at multiple points across each panel, not just the center. Edges and body lines are consistently thinner and are exactly where an aggressive polish will burn through first.
Studio Lighting for Paint Defect Detection
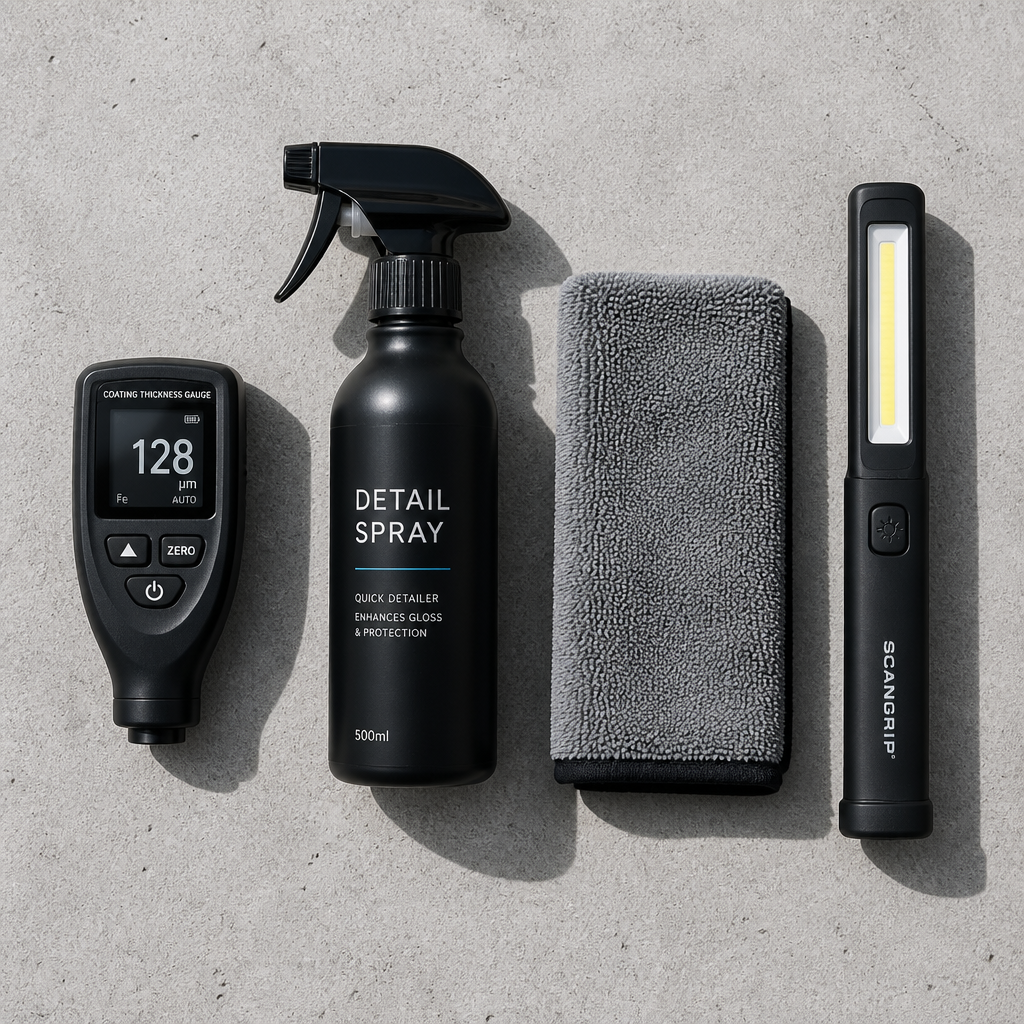
A paint thickness gauge tells you how much material you have to work with. Studio lighting tells you what is actually wrong with the surface. These are two separate pieces of information, and a complete inspection requires both. A detailer who only uses a gauge knows the thickness of a surface but cannot see whether it has buffer trails from a previous correction, water etching from Midwest hard water, or micro-scratches left by an automatic car wash. A detailer who only uses a light cannot tell whether the defects they are seeing are safe to correct.
Why Ordinary Shop Lighting Fails
Standard shop lighting, whether fluorescent tubes or a basic overhead LED grid, produces diffuse illumination that fills in micro-shadows across a paint surface. Swirl marks and fine scratches are essentially shallow channels in the clear coat, and diffuse light enters those channels from multiple angles simultaneously, effectively masking them. This is why a car can look clean under a fluorescent shop ceiling but appear covered in swirls the moment it pulls out into angled sunlight.
The issue with relying on sunlight, though, is that bright direct sun washes out shallow defects just as readily as diffuse shop lighting. The sweet spot for defect detection is a focused, high-intensity light source held or positioned at a specific angle to the paint surface. This raking light technique casts micro-shadows into scratches, swirls, and orange peel, making them unmistakable.
How Professional Studio Lighting Works in Practice
Professional detailing studios use high-intensity LED inspection panels, focused beam work lights, or purpose-built detailing lights that combine multiple color temperatures. A professional inspection light highlights swirls, scratches, and surface imperfections, with multiple lighting modes enabling accurate defect detection. The value of having multiple light modes is real: a cool white light shows scratches differently than a warm white or a daylight-spectrum source, and swapping between them catches defects that any single mode misses.
In a controlled studio environment like Hersheys' shop, the vehicle sits under a planned lighting array that allows the detailer to move around the car and view every panel from multiple angles. A single panel might be inspected from four or five positions before the defect map is complete. That level of rigor is impossible in a driveway or an open bay with ambient light competing from multiple directions.
Pro tip: Under inspection lighting, tilt the light source rather than moving your head. A 30-45 degree angle to the paint surface reveals the most swirls and scratches. Direct perpendicular illumination will hide most of the defects you are trying to find.
Hersheys' Inspection Process Step by Step
Hersheys Detailing has refined its inspection process across more than 500 vehicles detailed over seven years of operation in the Glendale Heights area, serving clients from Carol Stream, Bloomingdale, Wheaton, and beyond. The process is systematic, documented, and completed before any chemical or mechanical work begins on the vehicle.
Step One: Pre-Wash Visual Assessment
Before the vehicle is washed, the detailer performs an initial walk-around under studio lighting to identify any obvious pre-existing damage: rock chips, deep scratches, hail damage, or panels with a clearly different paint tone. These are documented and discussed with the vehicle owner before any work is agreed upon. This step protects both parties and sets realistic expectations about what correction can and cannot achieve.
Step Two: Post-Wash Paint Thickness Reading
Once the vehicle has been through a safe hand-wash and decontamination, the paint thickness gauge is used across every panel, with multiple readings per panel. The detailer records the values and flags any panel that is below safe polishing threshold, any panel showing dramatically elevated readings consistent with a prior repaint, and any areas with localized thin spots near edges or body lines. This data drives the entire correction plan.
Step Three: Studio Lighting Defect Mapping
With clean paint and thickness data in hand, the vehicle is moved under the inspection lighting array. The detailer systematically works across every panel with focused lighting, cataloguing swirl patterns, buffer trails from prior corrections, water etching, oxidation, and any paint transfer or contamination that survived the decontamination wash. A defect map is assembled that specifies which panels need what grade of correction.
Step Four: Correction Grade Assignment
Combining the thickness data and the defect map, Hersheys assigns a correction grade to each panel. A panel with sufficient clear coat and deep swirls gets a full two-stage or multi-stage machine polish. A panel that is thin but has only light marring gets a finishing-grade polish at most. A panel that is at or near the minimum safe thickness gets no mechanical polishing at all, and the owner is informed of its condition. This granular approach is what prevents the kind of wholesale correction that looks impressive in the short term but destroys the paint over multiple sessions.
A professional inspection is not a sales pitch for a higher-priced service. It is the only honest way to determine what a vehicle's paint can actually tolerate and still leave the shop in better condition than it arrived.
Comparison: Inspection Approaches in Professional Detailing
| Inspection Approach | What It Detects | What It Misses |
|---|---|---|
| Visual only (shop lighting) | Obvious chips, major scratches, heavy oxidation, panel color mismatches | Fine swirls, micro-scratches, buffer trails, sub-surface thinning, prior repaints hidden under matched paint |
| Paint thickness gauge only | Clear coat depth, repainted panels, panels with filler, edges near minimum safe thickness | Surface defect type and severity, water etching, oxidation patterns, swirl density and directionality |
| Gauge plus studio lighting (Hersheys process) | All of the above combined: thickness data, defect type, defect severity, panel-by-panel correction grade, pre-existing damage documentation | Sub-surface issues not visible even under optimal lighting (rare paint delamination or adhesion failures require separate assessment) |
The combined approach takes longer. It requires equipment investment. It demands trained eyes. But it is the only inspection method that produces a correction plan grounded in actual data rather than assumption. For a vehicle receiving a nano-ceramic SiO2 coating with a 5-8 year warranty, anything less rigorous is a disservice to the customer and a liability for the shop.
What the Inspection Reveals Before Ceramic Coating
Ceramic coatings are permanent, or close to it. A coating applied over defects locks those defects in place under glass. A coating applied over a thinned or compromised clear coat bonds to a surface that may separate or crack within the warranty period. This is why Hersheys' inspection process is not just best practice, it is a prerequisite for any coating work they do.
Hidden Repaints Are a Real Issue in the Chicago Market
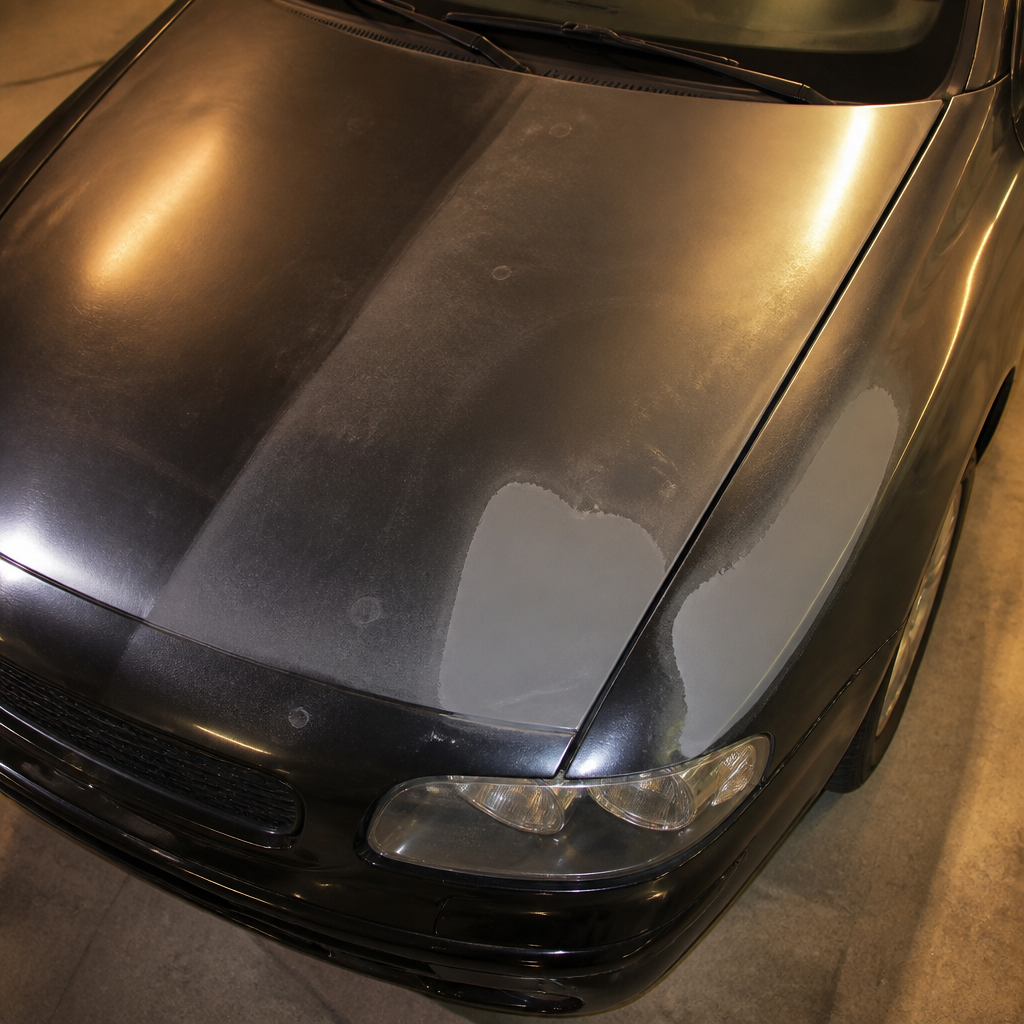
Illinois road salt and the stop-and-go traffic conditions on the routes connecting Glendale Heights, Carol Stream, and Bloomingdale mean that minor parking lot damage and fender benders are common. Many vehicles in this market have had at least one panel repainted at a body shop before their owners bring them in for detailing. A panel reading significantly higher than surrounding panels, for example 350 microns where adjacent panels read 120 microns, clearly indicates repainting. The quality of that repaint matters enormously for ceramic coating adhesion and for machine polishing safety.
Thin Edges Are the Most Common Mistake
Even on vehicles with factory paint in excellent overall condition, the edges of hoods, doors, and trunk lids are consistently thinner than the flat surfaces. Moving a gauge just an inch across a panel surface can reveal a significant change in thickness, demonstrating how much variation exists even on a single panel. An aggressive compounding pass run off the edge of a panel without edge protection can burn through to primer in a single pass. The inspection catches this before the polisher ever touches the car.
What Gets Documented and Why
Every vehicle that comes into Hersheys for paint correction or ceramic coating gets a documented pre-service record. This includes the thickness readings by panel, a notation of any panels identified as repaints, photographs taken under studio lighting of pre-existing defects, and the agreed correction scope. This documentation is not bureaucratic overhead. It is the professional standard that allows Hersheys to stand behind every job they deliver.
Frequently Asked Questions
What is a safe minimum paint thickness for machine polishing?
There is no universal threshold that applies to every vehicle, but in practice most detailers treat anything below 80-90 microns as too thin for machine polishing. At that level the clear coat is critically thin and even a single light polishing pass risks burning through to the base coat or primer. A panel in this condition should be noted, disclosed to the vehicle owner, and left unpolished or addressed only with a light hand application of a finishing product.
Can I tell if a panel has been repainted just by looking at it?
Usually not reliably. A skilled body shop using matched paint can produce a respray that looks identical to factory paint under normal viewing conditions. The paint thickness gauge reveals the hidden layer by showing an elevated reading, typically well above 200 microns, on a repainted panel compared to factory-standard readings on adjacent panels. Studio lighting can sometimes reveal texture differences between a respray and factory paint, but the gauge provides the definitive answer.
Why does the type of lighting matter so much for finding paint defects?
Swirl marks and fine scratches are physically shallow channels in the clear coat, typically only a few microns deep. Diffuse light enters these channels from multiple angles and prevents shadows from forming, which makes the defects nearly invisible. A focused, angled light source produces directional illumination that casts micro-shadows into the channels, making swirls, buffer trails, and scratches clearly visible. The type of light also matters: a cool-spectrum LED often reveals different defect patterns than a warm-spectrum source, which is why professional inspection setups use multiple color temperatures.
Does Hersheys Detailing perform a paint thickness inspection on every vehicle?
Yes, for any vehicle receiving paint correction or a ceramic coating, the paint thickness inspection is a standard part of the process, not an optional add-on. For exterior detail packages that do not involve machine polishing, a visual inspection under studio lighting is still performed to document pre-existing defects and set accurate expectations. This approach is standard at Hersheys across every service offered at their Glendale Heights location.
How does the inspection process at Hersheys differ from what a typical shop offers in the Chicago suburbs?
Most shops in the Chicago suburbs use overhead shop lighting and a visual pass before beginning work. Few use calibrated paint thickness gauges on every panel, and fewer still have purpose-built studio lighting arrays designed specifically for defect detection. The difference shows in the outcome: a shop that inspects with gauges and controlled lighting catches thin edges, hidden repaints, and severe swirl concentrations before they become problems. A shop that skips this step is relying on luck and may be polishing paint that cannot safely tolerate the process.
Is paint thickness inspection only relevant for older vehicles?
No. New and nearly new vehicles can arrive with panels that are already below safe polishing thickness, particularly on edges and body lines where robotic paint application is thinner by design. New vehicles can also have dealer-installed paint sealants or ceramic coatings applied by untrained technicians that leave texture or contamination underneath. The inspection is equally important for a one-year-old vehicle as it is for a ten-year-old one. The paint condition matters far more than the car's age.
If you have had a paint inspection done before a correction or coating service, we would like to hear what the process looked like and whether the results matched what you expected. Drop a comment or reach out directly.
We would love your feedback and any insights you would share with others. What perspective would you add?
References
- DeFelsko guide to using paint thickness gauges for automotive detailing, including clear coat safety thresholds and repaint identification
- DeFelsko overview of automotive paint inspection methods and how paint meters compare to visual and magnetic inspection tools
- Dr. Beasley's practical walkthrough of paint thickness gauge calibration and use in professional detailing, with real panel variation data
- Auto Finesse product page for professional inspection lighting, covering multiple lighting modes for accurate paint defect detection
- Cars24 explainer on how paint thickness checks during vehicle inspection reveal repainted panels and prior damage