Most drivers assume a single polishing pass will rescue their paint. Sometimes it does. But pull a swirl-heavy BMW or a sun-faded Audi under a proper LED inspection light, and a one-stage treatment often reveals exactly how much work it did not finish. Stage 1 paint correction in Illinois is the right call for lightly marred paint, but choosing the wrong stage means either wasting money on unnecessary aggression or wasting your time on a correction that barely touched the problem. This guide explains each stage, the defects each one is built to address, and the specific signs that tell you it is time to move from Stage 1 to Stage 2 or Stage 3.
Table of Contents
- What Paint Correction Actually Does
- Stage 1 Paint Correction Explained
- Stage 2 Paint Correction: When One Pass Is Not Enough
- Stage 3 Paint Correction and Multi-Stage Polishing
- Paint Correction Stages Side-by-Side Comparison
- How to Choose the Right Stage for Your Vehicle
- What Paint Correction Looks Like at Hersheys Detailing
- Frequently Asked Questions
- References
What Paint Correction Actually Does
Paint correction is the process of removing surface defects from your vehicle's clear coat through controlled abrasion. A machine polisher, matched with the correct compound and pad combination, removes a microscopic layer of clear coat to eliminate the scratches, swirl marks, and oxidation embedded within it. The goal is not to fill the defects with a glaze that washes away in weeks. The goal is to physically level the surface so that light reflects cleanly and evenly again.
The key variable is how much material needs to come off. A standard factory clear coat on a modern vehicle measures roughly 100 to 150 microns total. Paint correction at any stage removes only a fraction of that, but the exact amount depends entirely on how many stages are required. A single-stage correction removes roughly 1 to 3 microns, a two-stage removes roughly 3 to 8 microns, and a three-stage correction removes up to around 8 to 15 microns. Even aggressive three-stage work leaves substantial clear coat remaining for future maintenance and protection.
This is why measuring paint thickness before any correction is non-negotiable. At Hersheys Detailing, every paint correction begins with a paint depth gauge reading across all panels. If a panel reads below 40 microns, or shows significant variation that suggests a prior repaint, the recommendation changes. Honest assessment first, then tools.
| Key Insight | Explanation |
|---|---|
| Stage 1 is not a compromise | For paint with light swirl marks and no embedded scratches, Stage 1 is the correct and complete answer. Over-correcting removes clear coat you cannot get back. |
| Stage 2 is the most common real-world choice | Most vehicles with 2 or more years of regular use and automated car wash history need at least a compound step followed by a finishing polish. One pass will not fully clear moderate marring. |
| Stage 3 is reserved for severe defects | Deep scratches that require a heavy-cut compound before any refining work, along with significant oxidation on neglected paint, are the primary triggers for a third polishing stage. |
| Paint thickness measurements must come first | No correction stage decision is complete without a paint depth gauge reading. Thin clear coat, especially on previously corrected or resprayed panels, limits how aggressively you can cut. |
| Stage and clarity are not the same thing | A skilled detailer finishing a Stage 2 correctly will beat a sloppy Stage 3. The number of stages matters less than the precision of the compound and pad selection at each pass. |
| Illinois weather accelerates paint degradation | Freeze-thaw cycles, road salt, and summer UV exposure in the Chicago suburbs compound swirl marks and oxidation faster than in milder climates, making annual inspection sensible for high-end vehicles. |
| Correction before ceramic coating is not optional | A ceramic coating locks in whatever the paint surface looks like underneath it. Coating over unaddressed swirls and marring permanently seals those defects in place. |
Stage 1 Paint Correction Explained
Stage 1 correction, often called a single-stage polish or paint enhancement, uses one polishing step with a finishing compound and pad. The abrasive level is mild. The intention is to refine paint that is fundamentally sound but has accumulated the kind of light surface defects that rob it of depth and clarity.
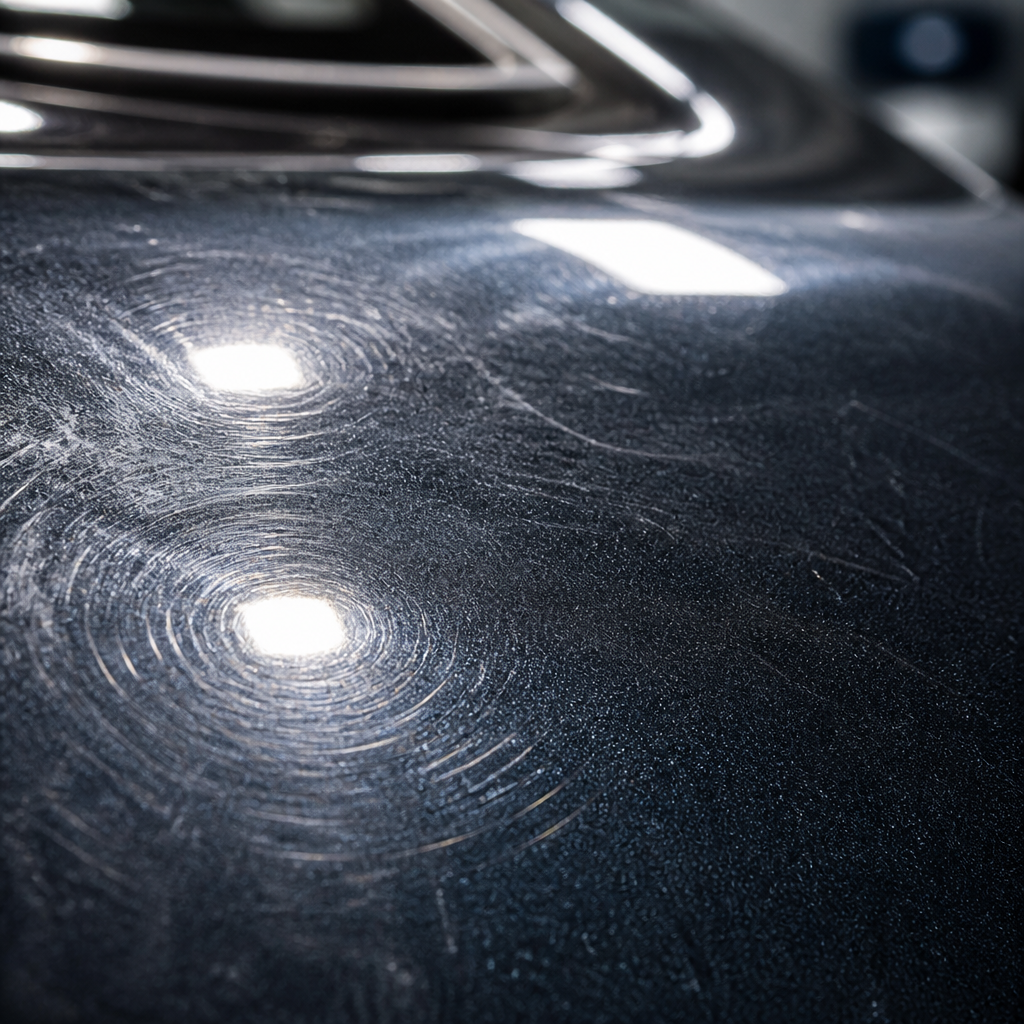
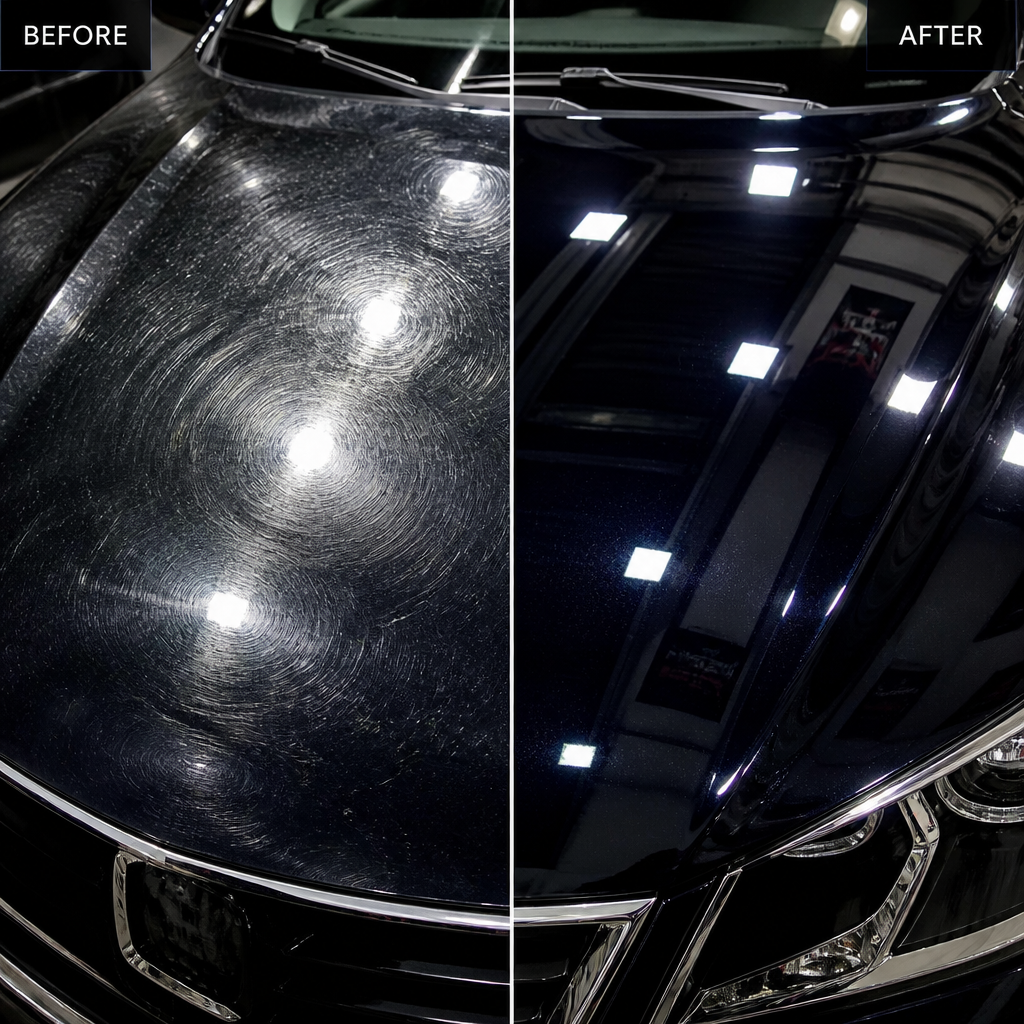
The defects Stage 1 addresses well are light swirl marks from improper washing, very fine water spot etching that has not chemically bonded into the clear coat, and the general haziness that develops on paint that has not been properly maintained over six to twelve months. If you run your fingernail across the paint and nothing catches, and the marks disappear under direct light from certain angles, Stage 1 is likely the correct call.
Where Stage 1 Falls Short
The honest limitation of Stage 1 is that a finishing polish is not aggressive enough to cut through scratches that have any real depth. If the defects catch your fingernail, if you see clear circular buffer trails from a previous amateur polishing attempt, or if the car came out of an automated tunnel wash repeatedly, Stage 1 will improve the paint but will not resolve it. You will be left with better-looking swirls, not eliminated swirls.
A common mistake is selecting Stage 1 because it is cheaper or faster, then calling the result acceptable. On a dark-colored vehicle, particularly black, dark blue, or dark grey, the remaining defects become unmistakably visible under direct sunlight or showroom lighting. Under-correcting and then applying a ceramic coating is one of the more expensive mistakes in detailing, because the coating will preserve and enhance the visibility of whatever defects remain underneath it.
Pro tip: If you are preparing your paint for a ceramic coating and you own a dark-colored vehicle that has been through an automatic car wash even a handful of times, start your assessment assuming Stage 2 minimum. You may be pleasantly surprised when inspection shows Stage 1 is enough, but you will not be caught under-correcting before a protection investment.
Stage 2 Paint Correction: When One Pass Is Not Enough
Stage 2 paint correction in Chicago and the surrounding suburbs is the level most well-used vehicles actually need. It uses two separate compound and pad combinations: a more aggressive cutting compound in the first pass to remove the embedded defects, followed by a finer finishing polish to eliminate the micro-scratching left by the first step and restore full gloss.
The defects that call for Stage 2 include moderate swirl marks that are clearly visible in direct light, light to moderate random isolated scratches, buffer trails from previous polishing work done with incorrect technique, and water spot etching that has had time to etch into the clear coat. If the paint looks noticeably dull in flat light and then reveals a web of swirling lines in sunlight, Stage 2 is the right starting point.
The correct process is always determined after inspecting the paintwork. Paint correction and machine polishing do not have standardized terms across the industry, and not every detailer works to the same standards. A Stage 2 from one shop may be equivalent to a Stage 1 from another. Insist on understanding what compounds, pads, and passes are actually included before booking.
The Two-Pass Process in Practice
In practice, Stage 2 typically begins with a medium to heavy-cut compound on a cutting pad, targeting the actual defects and leveling the clear coat surface. This step does the bulk of the correction work. The second pass uses a milder finishing polish on a softer polishing pad to remove the fine scratching the first compound introduced and to bring the paint to its maximum clarity.
The common mistake at this stage is using a finishing polish that is not aggressive enough to fully remove the micro-scratches from the compound step, or rushing the second pass to save time. The result is hologramming, those faint swirling trails visible at specific angles that indicate the polisher was moved too fast or the polish was not fully worked out. A properly finished Stage 2 should leave paint looking genuinely flawless under direct LED inspection, not just better than when it arrived.
Pro tip: A thorough decontamination wash, iron remover, and clay bar treatment must happen before any polishing step. Polishing over embedded iron particles or rail dust grinds those contaminants across your clear coat and introduces new scratches while you are trying to remove them. Skipping decontamination is the single biggest cause of disappointing correction results.
Stage 3 Paint Correction and Multi-Stage Polishing
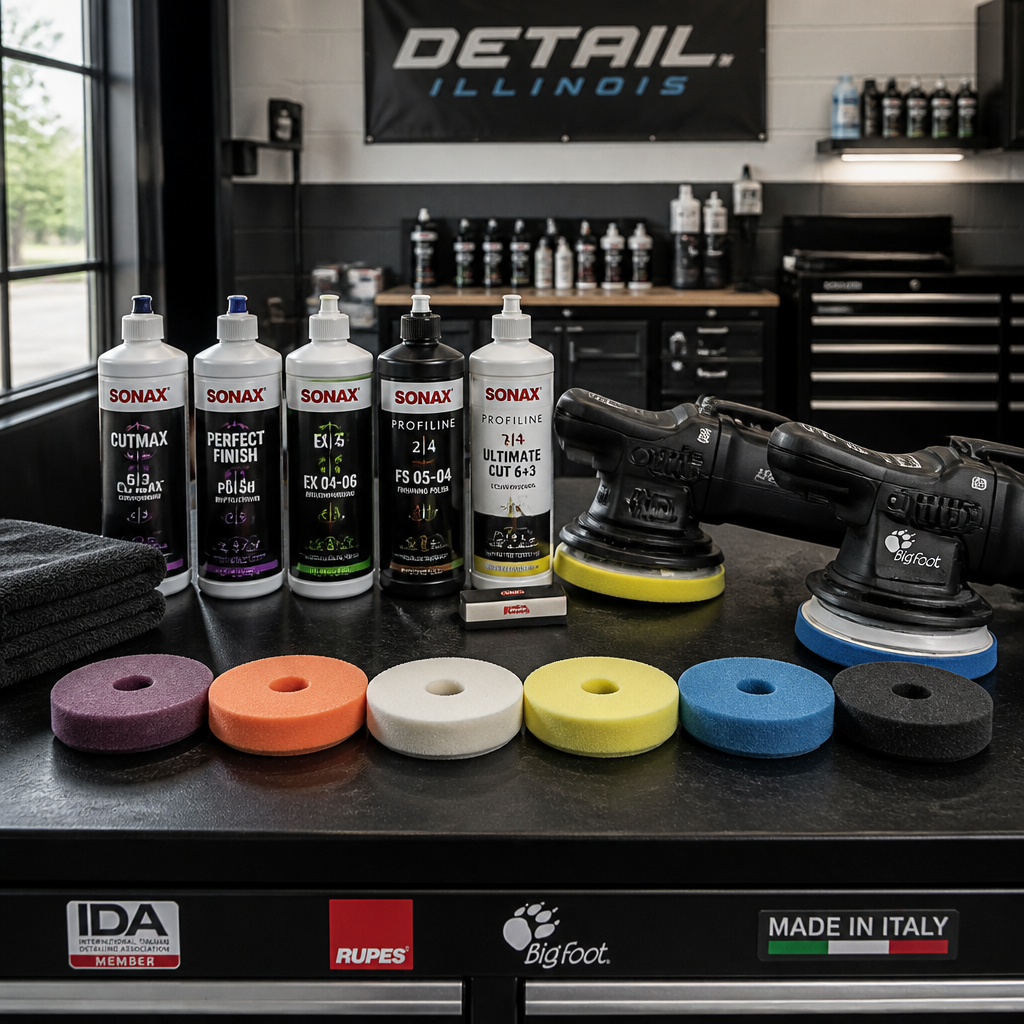
Stage 3 correction, and the broader category of multi-stage polishing in Glendale Heights and beyond, is appropriate when the paint has defects that a medium compound alone cannot fully cut through in a single pass. This typically means a heavy-cut compound is needed as the first step, followed by a medium compound to refine the surface, and then a finishing polish to bring it to full gloss. Three separate passes, each with a different product and pad.
The scenarios that genuinely require Stage 3 are more specific than most people think. Severe oxidation on a vehicle that has been left unprotected for years, deep random isolated scratches that have not penetrated through the clear coat to the base coat, significant buffer trails from aggressive amateur correction, and paint that was never properly prepared before a prior coating application all qualify. If you can feel the scratches with light fingernail pressure but the nail does not catch hard, they may still be within the clear coat and addressable at Stage 3.
What Stage 3 Cannot Fix
Stage 3 correction is not a substitute for a respray. Scratches that penetrate the clear coat and into the base coat or primer, clear coat that is peeling or flaking, or paint that has failed in large patches require a body shop, not a polisher. Attempting to polish over genuinely failed clear coat removes the last protection the base coat has and accelerates the damage. At Hersheys Detailing, if a paint depth reading or visual inspection shows the clear coat is failing rather than merely scratched, that vehicle is advised to visit a body shop before any correction work is attempted.
The Diminishing Returns Calculation
Stage 3 is significantly more time-intensive than Stage 2, which means it carries a higher price. The decision should be proportional to the vehicle's value and condition. A well-maintained luxury vehicle with substantial paintwork investment ahead of it is a natural Stage 3 candidate. A daily driver with moderate paint on which Stage 2 removes 80 to 85 percent of visible defects may not benefit proportionally from the additional time and cost of adding a third pass for marginal improvement.
Paint Correction Stages Side-by-Side Comparison
Understanding the differences between stages at a glance helps set the right expectations before your vehicle comes in for assessment. The table below reflects how these stages are applied at a professional level, using calibrated compounds, machine polishers, and paint thickness monitoring throughout the process.
| Correction Stage | Defects Addressed | Typical Polishing Steps |
|---|---|---|
| Stage 1 (Single-Stage Polish) | Light swirl marks, minor water spot haze, general paint dullness from lack of maintenance | One pass: finishing polish on a polishing pad. No compounding step required. |
| Stage 2 (Two-Stage Correction) | Moderate swirl marks, light to moderate random scratches, buffer trails, embedded water spots | Pass 1: medium or heavy-cut compound on a cutting pad. Pass 2: finishing polish on a soft pad to remove compound micro-scratches. |
| Stage 3 (Multi-Stage Polishing) | Severe oxidation, deep in-clear-coat scratches, heavy buffer trails, long-neglected paint requiring full restoration | Pass 1: heavy-cut compound on an aggressive pad. Pass 2: medium compound to refine. Pass 3: finishing polish for final gloss and clarity. |
How to Choose the Right Stage for Your Vehicle
The decision starts with an honest inspection, not a price list. Paint condition varies not just between vehicles but between panels on the same vehicle. Hoods and roofs take the most UV exposure and mechanical contamination. Door panels behind the front wheels accumulate swirls from road debris. Trunk lids on sedans often have scratch clusters from bags and keys.
The practical inspection process runs like this. Start with a bright LED light or bright direct sunlight. Look at the paint from multiple angles. If swirl marks disappear when the light changes angle, they are likely surface-level and Stage 1 or Stage 2 will address them. If they are visible at every angle and some appear as distinct lines rather than fine webs, Stage 2 is the floor. Run your fingernail very lightly across the most affected area. If the nail drags and catches on a scratch edge, Stage 2 minimum. If multiple panels have overlapping deep scratches alongside oxidation-related dullness, Stage 3 deserves consideration.
Vehicle Age and History Matter More Than Mileage
A three-year-old vehicle that spent two of those years parked outside in the Chicago suburbs, run through a gas station tunnel wash every two weeks, likely has worse paint defects than a ten-year-old vehicle that was hand-washed, garaged, and regularly polished. Age is less predictive than maintenance history when determining correction stage. The specific question is: what has happened to this paint, and how deeply have those events affected the clear coat?
Illinois-specific factors worth accounting for: road salt residue from winter driving embeds in the clear coat and needs iron decontamination before any polishing. The UV load during Chicago-area summers is real, particularly for vehicles stored outdoors. And the freeze-thaw cycle accelerates micro-crack propagation in already-stressed clear coat. These are the environmental reasons why vehicles in Carol Stream, Bloomingdale, Wheaton, and the broader Chicago suburbs often present with more paint degradation than their age would suggest.
What Paint Correction Looks Like at Hersheys Detailing
At Hersheys Detailing in Glendale Heights, every paint correction service starts with a decontamination wash, an iron remover step to dissolve embedded ferrous particles, and a clay bar treatment to strip bonded surface contamination before a single polishing pad touches the paint. This is not optional preparation. It is the foundation that determines whether the polishing stages that follow actually correct the paint or simply redistribute contamination.
Paint thickness readings are taken across panels before the first compound step is selected. The compound, abrasive level, pad type, and machine speed are chosen based on what the paint actually shows, not what a standard service tier specifies. For vehicles receiving a ceramic coating afterward, a two-step correction is included as part of the package. Coating over uncorrected paint makes no sense. The nano-ceramic SiO2 layer will seal in whatever surface condition exists underneath it, and that condition needs to be as close to perfect as the paint allows.
For owners of luxury vehicles preparing for a ceramic coating investment or simply wanting to restore their paint before Illinois winter, a proper in-person assessment under inspection lighting is the only way to give an honest stage recommendation. Contact Hersheys Detailing to schedule a consultation and find out exactly what your paint needs, and what it does not.
Frequently Asked Questions
Is Stage 1 paint correction worth it if my paint only has light swirl marks?
Yes, absolutely. Stage 1 correction is the correct and complete treatment for paint with light swirl marks and no embedded scratches. It removes the surface-level defects that cause dullness and that web-like shimmer under direct light, and it restores genuine gloss without removing more clear coat than necessary. The key is confirming through inspection that the defects are genuinely light before committing to one stage. A good detailer will tell you if the paint needs more than Stage 1.
How do I know if my car needs Stage 2 paint correction in Chicago?
Look at your paint in direct sunlight or under a bright LED torch from multiple angles. If you see a consistent pattern of circular swirl marks clearly visible at most angles, if there are distinct random scratches that do not disappear as the light angle changes, or if the paint came out of an automated car wash regularly over the past year or two, Stage 2 is almost certainly appropriate. Run your fingernail very lightly across the worst area. If it catches at all, Stage 2 is the minimum.
Can Stage 3 paint correction remove all scratches?
No. Stage 3 can remove defects that are contained within the clear coat layer. Scratches that have penetrated through the clear coat into the base coat or primer are not correctable by polishing. Those require touch-up paint or body shop work. The way to test this is to look at the scratch under bright light. If it appears white or shows a different color than the surrounding paint, it has likely gone through the clear coat. If it is just a shadow or groove visible from certain angles, it may still be correctable.
Does paint correction permanently remove swirl marks?
Yes. Paint correction physically removes the material around the scratch, leveling the clear coat surface so that the scratch no longer exists. This is different from a filler-based glaze or wax, which temporarily masks defects but washes away. The correction is permanent in the sense that the defect is gone. New swirl marks can form afterward from improper washing or contact damage, which is exactly why applying a ceramic coating or paint protection film after correction is a practical investment in maintaining the result.
How long does multi-stage paint correction take in Glendale Heights?
A genuine Stage 2 correction on a full-sized sedan typically requires a full day of professional work when you include decontamination, paint assessment, two polishing stages, and panel wipe-down. Stage 3 corrections on heavily defected paint or larger vehicles can extend to two days. Any quote significantly shorter than this for a full-vehicle correction should prompt questions about what steps are being skipped. Speed and thoroughness are fundamentally in tension when it comes to paint correction.
Should I get paint correction before or after applying a ceramic coating?
Always before. A ceramic coating bonds directly to the clear coat surface and amplifies the appearance of whatever is underneath it. Applying a ceramic coating over swirl marks, scratches, or oxidation does not hide those defects. It deepens the clarity and gloss of the surface, which means the defects become more visible, not less. At Hersheys Detailing, the two-step paint correction included with every ceramic coating package exists precisely because this order of operations is not negotiable.
Have you had a paint correction done on your vehicle and been unsure whether the stage you chose was really the right one? Share your experience in the comments below.
References
- Ceramic Pro: What paint correction does and how each stage addresses different defect levels
- Multi-stage paint correction guide covering micron removal estimates and clear coat thickness considerations
- Swirl mark removal: causes, professional correction methods, and when DIY is insufficient
- Paint correction stages explained: how Stage 1, Stage 2, and Stage 3 differ in practice
- What paint correction is and why standardized stage terminology varies between detailers